Migrating a WordPress site can seem daunting, but with the right tool, it’s a straightforward process.
This post shows you the step-by-step process of how to transfer a WordPress site using the Duplicator plugin.
Duplicator makes the process of moving a live WordPress site to a local host using completely error-free.
What is the WordPress Duplicator plugin?
The Duplicator plugin is a robust WordPress migration tool that creates a secure package of your website, which you can restore anywhere. Ideal for both backups and migrations, it handles sites up to 100GB and boasts over 1 million active installations, making it one of the oldest and most popular migration plugins. Loved for its ease of use and reliability, Duplicator suits both personal bloggers and business websites, ensuring a smooth and secure migration process.
WordPress migration using Duplicator step-by-step
Step 1: Create a package
1.1 Access your dashboard
Log in to your WordPress dashboard and navigate to Duplicator > Packages. This will open the Packages management dashboard where any previously created packages will be listed.
1.2 Create a new package
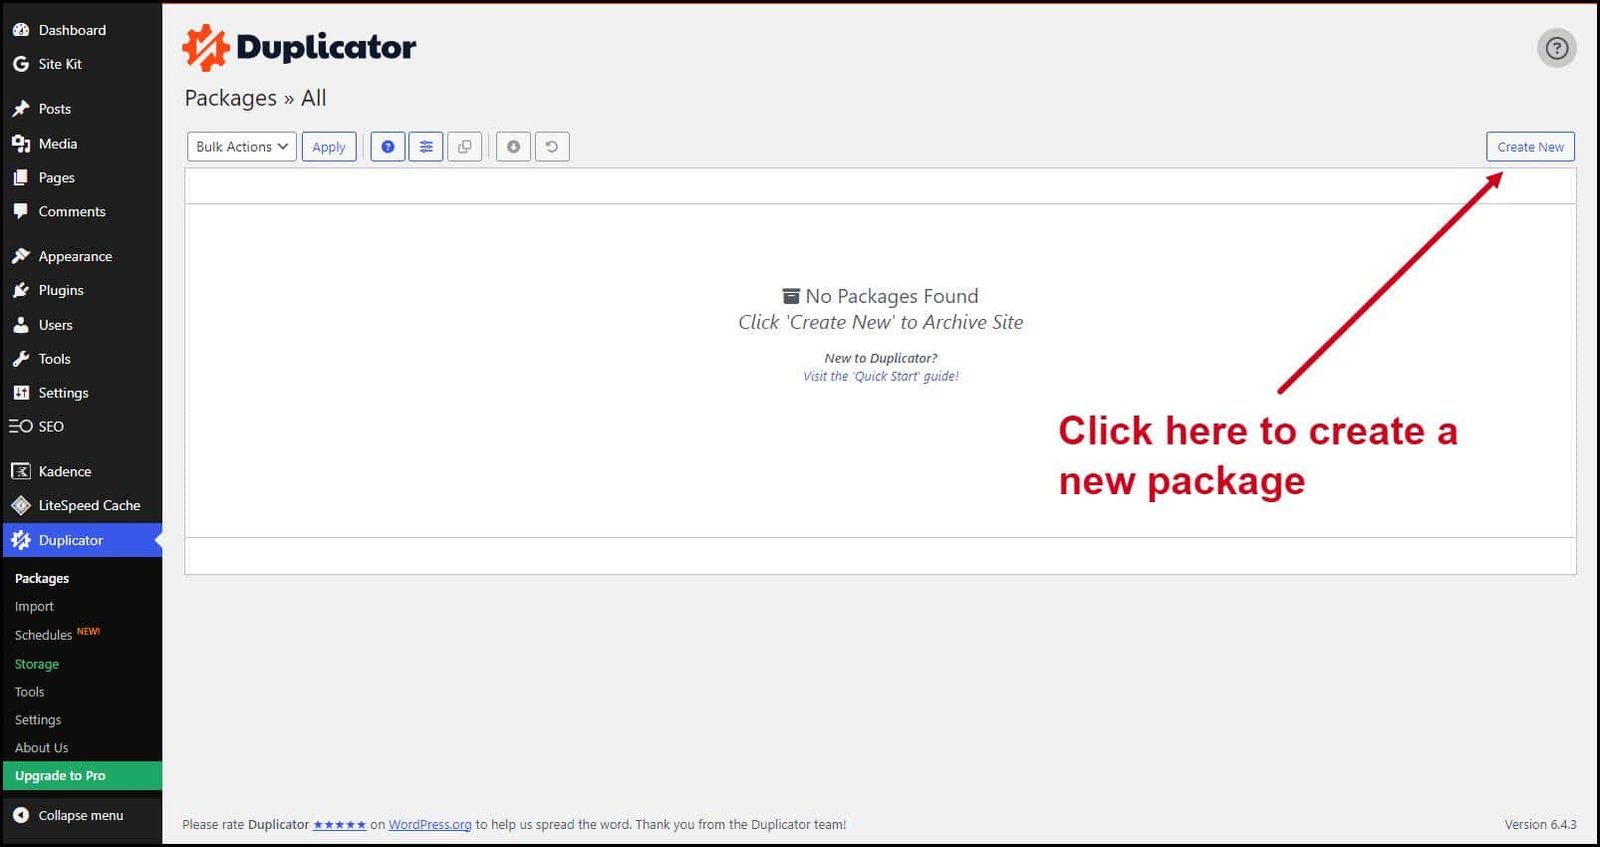
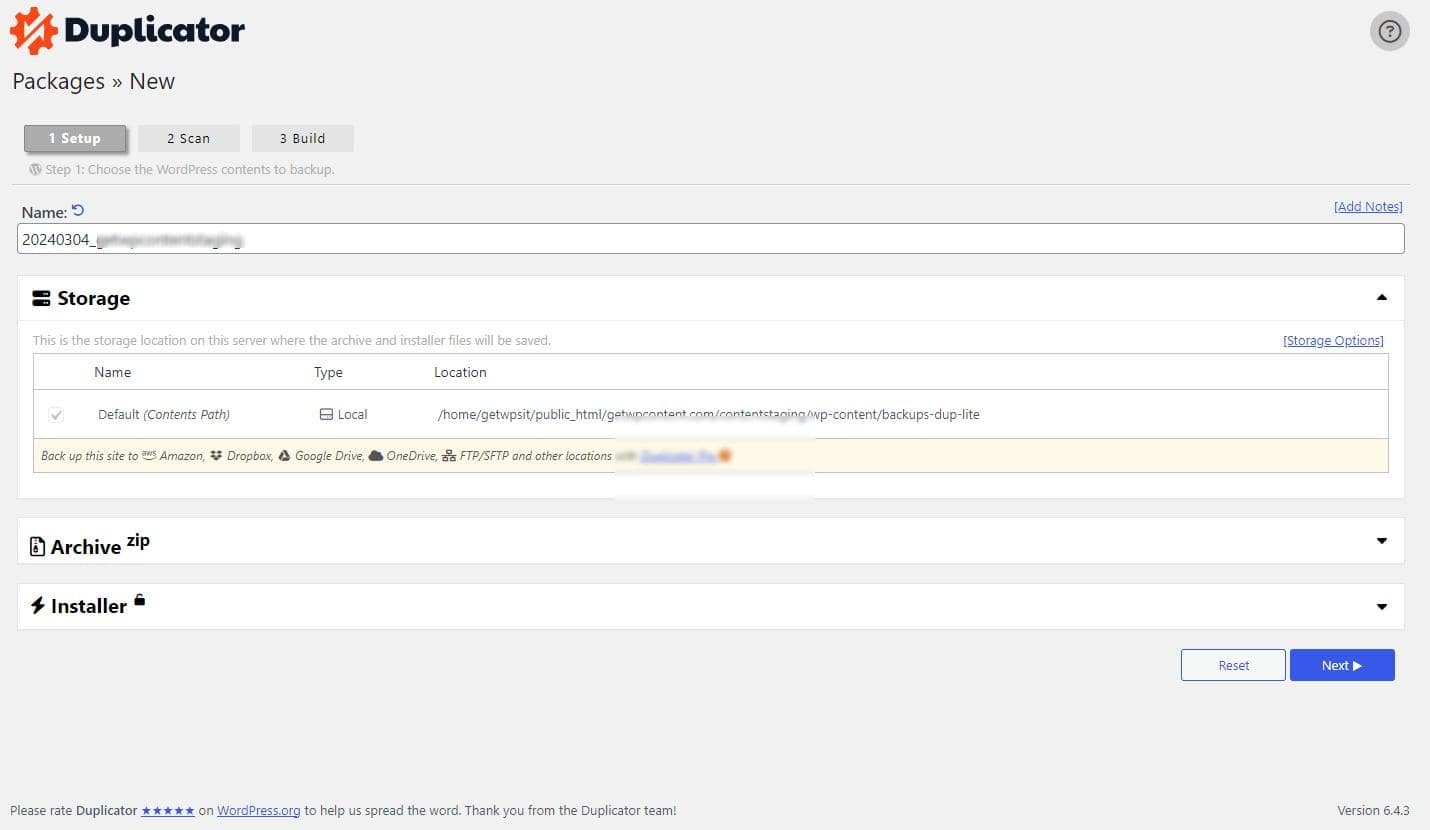
Click on the Create New button. This will bring up the package creation screen. Here, you can edit the package name and specify the storage path. By default, the zip file is stored in the wp-content folder.
1.3 Configure storage options
Under Storage settings, you can configure where to store your package. Duplicator Pro offers more options, including various cloud storage services.
1.4 Scan system settings
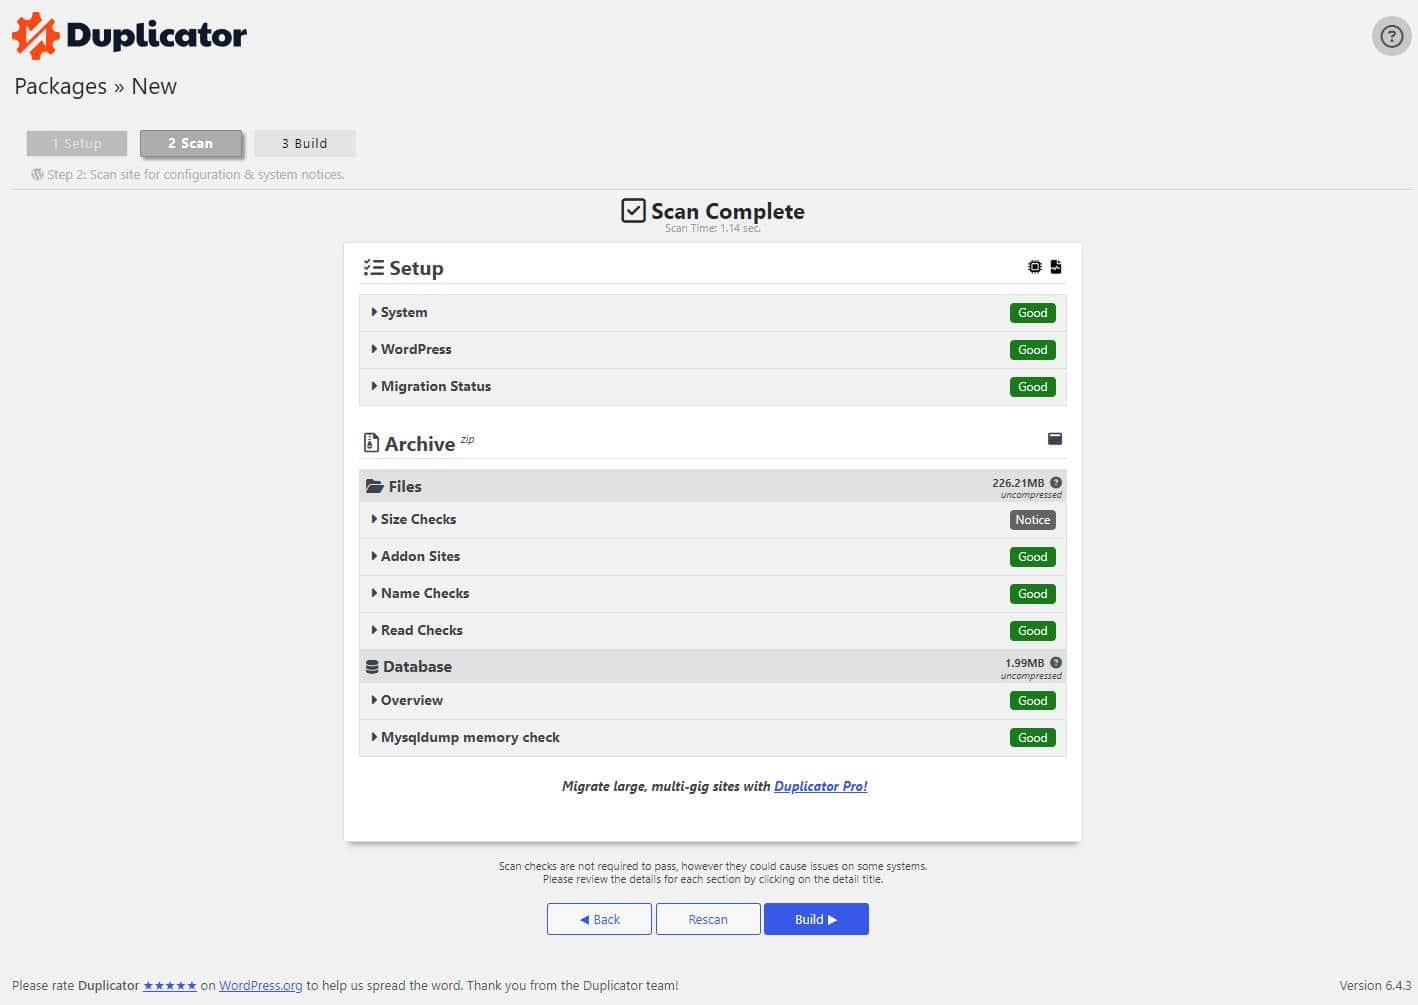
Click the Next button to proceed. Duplicator will scan your system settings to ensure everything is ready for package creation. This step is crucial as it helps identify any potential issues that might arise during the build process. The scan checks the database and file integrity, ensuring that the package creation will go smoothly.
1.5 Build the package
If everything checks out, click on the Build button. The build process typically takes about a minute. During this time, Duplicator compiles your WordPress site’s files and database into a single package. Once completed, you will receive a confirmation message.

1.6 Download the package
Once the package is built, download the package files by clicking the large blue buttons. You can download the files separately or as a single zip file. This package will contain all the necessary files to recreate your site on the local host.
Step 2: Create an empty database
2.1 Access phpMyAdmin
Use phpMyAdmin to create a new database. Log in to phpMyAdmin and create a new database using the default root user credentials (user: root, password: ”). This tool is available in most hosting control panels and allows for easy database management.
2.2 Using Laragon
If you’re using Laragon, use HeidiSQL to create an empty database and a user with all privileges. In Laragon, click the “Database” button to launch HeidiSQL. This interface simplifies the database creation process, making it accessible even for beginners.
2.3 Run commands
Open the SQL command window and run the following commands to create the database and user:
CREATE DATABASE duplicator; USE duplicator; CREATE USER ‘dup1’@’localhost’ IDENTIFIED BY ‘dup1000’; GRANT ALL ON duplicator.* TO ‘dup1’@’localhost’;
These commands set up a new database called “duplicator” and create a user with all the necessary privileges to manage it.
Step 3: Launch installer
3.1 Place files in the right folder
Download the installer and backup files, and place them in the appropriate folder. For this tutorial, create a folder named “duplicator” in the “www” directory of Laragon. This is where your local server environment will look for the installation files.
3.2 Activate the installer
Type 127.0.0.1/duplicator/installer.php in your browser to activate the installer. This URL points to the installer script that will guide you through the rest of the setup process.
3.3 Perform requirements check
The installer will validate that all basic settings match those of the old database. This includes checking PHP versions, required extensions, and file permissions. Ensuring these settings match is crucial for a smooth migration.

Step 4: Extract files and restore WordPress
4.1 Proceed with restoration
Accept Duplicator’s terms and conditions, then click Next. If there’s already a WordPress installation in the target directory, you’ll be prompted to use the manual extraction process. This step prevents accidental overwriting of an existing site.
4.2 Search and replace URLs
Duplicator will perform a search and replace on the relevant URLs and then delete the installation files. This automatic process updates your site’s URLs to reflect the new local environment, ensuring all links and references work correctly.
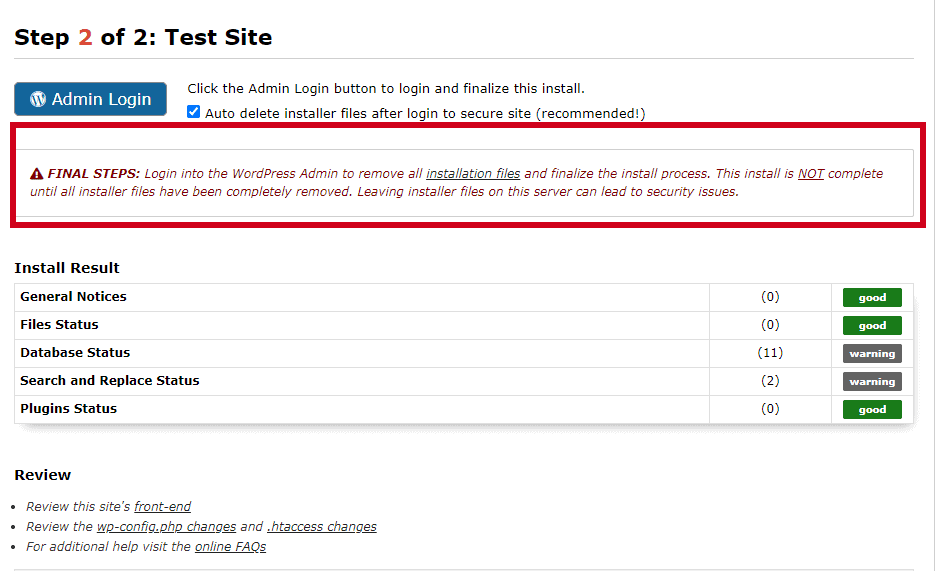
4.3 Complete the process
Once completed, you’ll see a success screen upon logging into the dashboard. This indicates that your site has been successfully migrated to the local host.

Tips for seamless WordPress migration
- Backup Your WordPress Site
Always backup your site before migrating. This ensures you have a fallback in case anything goes wrong. Use reliable backup tools and store your backups in a secure location.
- Use Trusted Tools
Duplicator is a reliable WordPress migration plugin with a proven track record. Its robust features and user-friendly interface make it a top choice for many WordPress users.
- Seek Expert Help
If you’re unsure or face issues, consider getting help from a WordPress professional. Experts can handle complex migrations and troubleshoot any problems that arise, ensuring a smooth transition.
Conclusion
Migrating your WordPress site to a local host using the Duplicator plugin is a straightforward process if you follow these steps. Always ensure you have a backup and use trusted tools to make the process smooth.
What is your experience using the Duplicator WordPress plugin?
